Your Comprehensive Guide to Demolishing a Shed
Many homeowners eventually come face-to-face with an old, worn-out shed and wonder if they should tackle the demolition project on their own. Whether your shed is rotting, rusted, or simply taking up valuable space, the idea of tearing it down yourself can be tempting. It sounds like a chance to save money, handle the project on your schedule, and enjoy the satisfaction of accomplishing something big in your own backyard. But shed teardown involves more than just swinging a sledgehammer. In this comprehensive guide, you’ll learn about the tools you need, safety precautions to take, and how to decide if a DIY approach is right for you.
Understanding Shed Demolition
A typical backyard shed can serve many purposes: storage for gardening equipment, bikes, or tools. Over time, though, a shed might become less of an asset and more of an eyesore—especially as weather damage, rust, or rot set in. Demolishing a shed requires strategy and caution, since sheds often have structural elements such as frames, floors, and roofs that must be taken apart in a safe, methodical way. Mishandling any stage of the process can lead to injuries or unexpected property damage. If you’re in an urban residential area, there might also be local ordinances or disposal requirements you need to follow.
Planning the Project
Before you head outside with a crowbar, it’s best to plan every step of your demolition. Think about the size, construction style, and final goal for the area once the shed is removed. Will you replace it with a new structure? Is the space going to be part of a landscaping project? For most sheds, the frame is usually made of wood or metal, while roofing materials may include shingles, metal panels, or even plywood and felt. Consider whether you have the right tools, protective clothing, and knowledge to take these materials apart safely. You may also need permission or permits from your local municipality, depending on the shed’s dimensions. Start by gathering this information so you don’t run into legal or logistical complications once you begin.
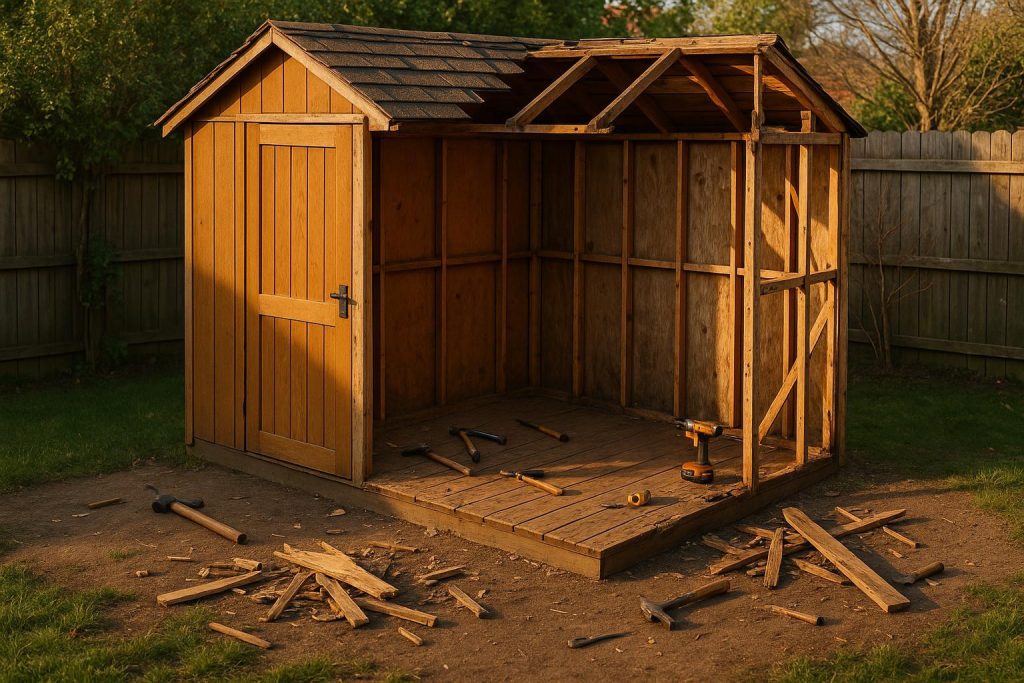
Essential Tools and Safety Gear
Safety should be your first priority when tackling demolition, no matter the size of the structure. At a minimum, you’ll need:
- Protective Clothing: Wear heavy-duty gloves to protect your hands from splinters, nails, and jagged edges. Boots with slip-resistant soles can reduce the risk of falls on uneven ground. Long sleeves and pants can minimize scrapes and cuts.
- Eye and Ear Protection: Safety glasses or goggles shield your eyes from flying debris. If you’ll be using saws or power tools, include earplugs or earmuffs to protect against hearing damage.
- Respirator or Dust Mask: Demolishing older structures can kick up dust, potentially containing allergens or irritants. A dust mask helps maintain safe, breathable air.
- Tools for Disassembly: Common shed demolition tools include crowbars, hammers, drills, pry bars, adjustable wrenches, and a reciprocating saw if you need to cut through boards or metal sections.
- Waste Removal Equipment: Large trash bins, wheelbarrows, or a pickup truck are essential for carting away debris. Keep an organized plan for where everything will go once it’s torn apart.
Don’t underestimate how demanding the work can be. Demolition is physical labor, and you’ll be lifting, prying, and maneuvering awkward materials, sometimes in cramped spaces. Make sure you’re physically up to the challenge or have friends or family to help.
Step-by-Step Demolition Process
Once you’re set on demolishing your shed, you might follow these general steps:
- Clear the Area: Remove any items stored inside the shed. Check for stacked cardboard boxes, lawn mowers, or gardening supplies. Clear a good perimeter around the shed so you have room to maneuver.
- Disconnect Utilities (If Applicable): Some sheds have electrical wiring for light fixtures or outlets. Make sure to turn off the power supply before you begin. If your shed has any water lines, shut these off and remove them safely.
- Remove Roofing: Start at the top and work your way down. If you have shingles, they might be nailed or stapled. Metal roofing might be screwed or bolted in place. Carefully remove each piece and stack it away from your work area.
- Take Off Doors and Windows: Unscrew or pry off any doors and windows to reduce the overall weight of the structure and prevent broken glass injuries during disassembly.
- Disassemble Walls: Sheds typically have four walls secured by nails or screws at the top plate and bottom plate or anchored to corner posts. Use your pry bar, hammer, or power tools to slowly detach them, watching for any structural beams that could fall unexpectedly.
- Address the Floor: Many sheds have wooden floors set on blocks or a simple foundation. Remove any floorboards, paying attention to nails that could stick out. If there’s a foundation made of concrete slabs, decide if you want to tear that out as well or keep it as a base for a new project.
- Sort and Remove Debris: As you dismantle each component, separate wood, metal, and other materials into piles. This makes disposal easier. A methodical approach helps keep your work area clear, reducing the risk of trips and falls.
If at any point you feel overwhelmed, step back and reconsider whether a do-it-yourself approach is truly worth the effort and risk.
Disposal and Clean-Up
After a day (or more) of hauling wood, metal, shingles, and nails out of the yard, you’ve still got to deal with proper disposal. Local authorities have regulations about where certain materials can go, especially if some pieces are hazardous—for example, asbestos found in older roofing or siding. In many places, you’ll need to separate these materials and pay fees to drop them off at designated waste facilities. For those reasons, hauling away debris isn’t always straightforward. Make sure you have the right sized vehicle, or rent a dumpster if you expect a large quantity of materials.
Properly disposing of your debris is not only good for the environment but also helps avoid fines or penalties. Double-check with your local waste management department for guidelines on disposing of wood, metal fragments, roofing, and any electrical components. Keeping these guidelines in mind will save you both time and money in the long run.
Factors to Consider Before Going DIY
One of the biggest draws to DIY shed demolition is cost savings. You may feel confident that you can handle the entire project on your own. However, there are a few factors to keep in mind:
- Physical Demands: The process can be more physically intensive and time-consuming than you anticipate. Large panels, heavy roof sections, and embedded nails can all lead to accidents or fatigue.
- Time Commitment: Removing a shed by yourself might take a weekend or more. Small structures can go faster, but any shed with a solid frame can become a multi-day project. Factor in your own schedule to ensure you can complete the job safely without rushing.
- Disposal Costs: You may need to rent a trailer, hire a hauling service, or pay dumping fees. These costs can add up, reducing your initial savings.
- Permitting and Regulation: Always check local bylaws about demolition work, especially if your shed is large or close to property boundaries. Some cities require you to obtain a permit for structures over a certain square footage.
Taking everything into account, the DIY route isn’t always the cheapest or most efficient choice. If you cannot easily arrange for safe debris disposal or if you suspect you might not meet local regulations, professional help might be best.
When Professional Assistance Makes Sense
Hiring demolition professionals can be a good investment, particularly if your shed is large or built with complex materials. You may also have multiple structures on your property that you want removed. Contractors often bring specialized tools and years of experience that help complete the project faster and with fewer risks. If your shed is already showing signs of rot, mold, or pest infestation—like termites—it’s wise to have experts on site to handle any hazardous conditions. The convenience alone can be worth it, as professionals typically haul away all the debris, saving you the trouble of sorting, loading, and transporting it yourself.
For homeowners in need of light demolition services, a local company can often address the job in far less time than a solo DIY effort. If you’re in the Edmonton area or surrounding communities, professional crews are available who know exactly how to take apart sheds, decks, or even partial garage structures. This knowledge reduces concerns about cuts, falls, and major property damage. While there’s a fee to hiring them, the efficiency and reduced liability are significant benefits.
Cost Considerations
Ultimately, budget is a big factor for many homeowners. The cost of a professional shed demolition typically includes labor, hauling, disposal, and any necessary permits. If you’re considering expert help, ask for an estimate in writing so you know the total price up front. Some companies might charge based on the volume of material removed, while others might quote a flat rate for demolition projects.
If you prefer DIY, you’ll have to account for your own time, the cost of renting or buying tools, and any disposal or landfill fees. In some cases, if you lack essential tools or a suitable vehicle for hauling, the added purchases and rentals may make professional help the more cost-effective option. A thorough price comparison can give you clarity on the best path forward.
Potential Hazards and Pitfalls
Even if you have the most detailed plan, unexpected issues can arise during shed demolition. Older sheds might contain asbestos if they used specific roofing materials or insulation. Mold and mildew can be hidden behind boards, exposing you to higher health risks. Sharp nails or screws may lurk under rotted wood planks. Additionally, if you’re not accustomed to using power tools, a single slip can cause a serious injury. Finally, consider how a poorly executed demolition might affect your property’s appearance or your ability to build something new in the same spot. Always proceed with care, and if in doubt, call professionals.
Why Call in the Pros?
If you’re short on time, don’t own the proper equipment, or simply want to avoid heavy lifting, enlisting professional help can save you a significant amount of stress. Experts know how to bring down a freestanding structure without endangering nearby fences, trees, or other property features. They also handle waste disposal, ensuring everything from broken glass to rotted wood is disposed of according to local regulations. This peace of mind is especially valuable if your property is in a highly regulated area or near neighbors who could be impacted by noise, debris, or dust.
When it comes to demolition, The Junk Guys specialize in the removal of small structures, including sheds. If your priority is a quick, efficient, and low-hassle experience, you can explore their demolition services. Their team can show up with the right equipment and knowledge to get the job done on a schedule that meets your needs, removing the whole structure and cleaning up the space. This allows you to focus on remodeling your yard, setting up new landscaping, or just enjoying a clutter-free outdoor area.
Tips for a Successful DIY Demolition
If you’re set on taking on the challenge yourself, here are a few reminders:
- Check Your Insurance Coverage: Confirm your homeowner’s insurance covers accidents or damage to your property during DIY demolition.
- Have Backup: Bring a friend or family member on the day of the demolition to help lift materials and keep an extra eye on safety.
- Stay Hydrated and Take Breaks: Demolition can be exhausting, especially outdoors in warm conditions. Short breaks can help prevent injuries caused by fatigue.
- Keep a First Aid Kit Nearby: Cuts, scrapes, and splinters are common when tearing down wood or metal structures. A basic first aid kit can be invaluable.
- Plan for Debris Management: Save time by stacking materials in designated piles. Keep nails or sharp edges pointed away from walking paths.
By following these guidelines, you can reduce the risks and complete your project in a thorough, organized manner.
Conclusion: Weighing Your Options
Demolishing a shed yourself might feel like a weekend project you can manage with the right tools and a well-thought-out plan. If you enjoy hands-on tasks, you can find it rewarding and learn new DIY skills. However, it’s critical to recognize the physical labor and time involved. The need to stay safe, dispose of materials properly, and follow potential city regulations adds complexity to what might initially seem like a simple job.
If you’d rather avoid the sweat and potential headaches of a DIY teardown, professional demolition services are always a phone call away. Whether you handle it yourself or bring in the pros, the important thing is that the job is done safely, within your budget, and in harmony with any local requirements. With the shed finally off your property, you’ll have a clean slate for your next big idea—be it a new shed, garden plot, or open space for family fun. Regardless of your choice, the end goal is a more organized yard and the peace of mind that comes from reclaiming your space.