Comprehensive Methods to Remove or Dissolve Flooring Glue
Flooring adhesives, also known as flooring glue, are specifically formulated to hold materials like tile, carpet, or vinyl firmly in place over time. Because of their strong bonding properties, they can be challenging to remove or dissolve once you decide to replace or remove your flooring. Whether you’re doing a small DIY project in your home or working on a more extensive renovation, it’s important to understand the right techniques and products to get the job done. Below, we’ll explore multiple methods, safety considerations, and practical steps to help you remove or dissolve flooring adhesives effectively.
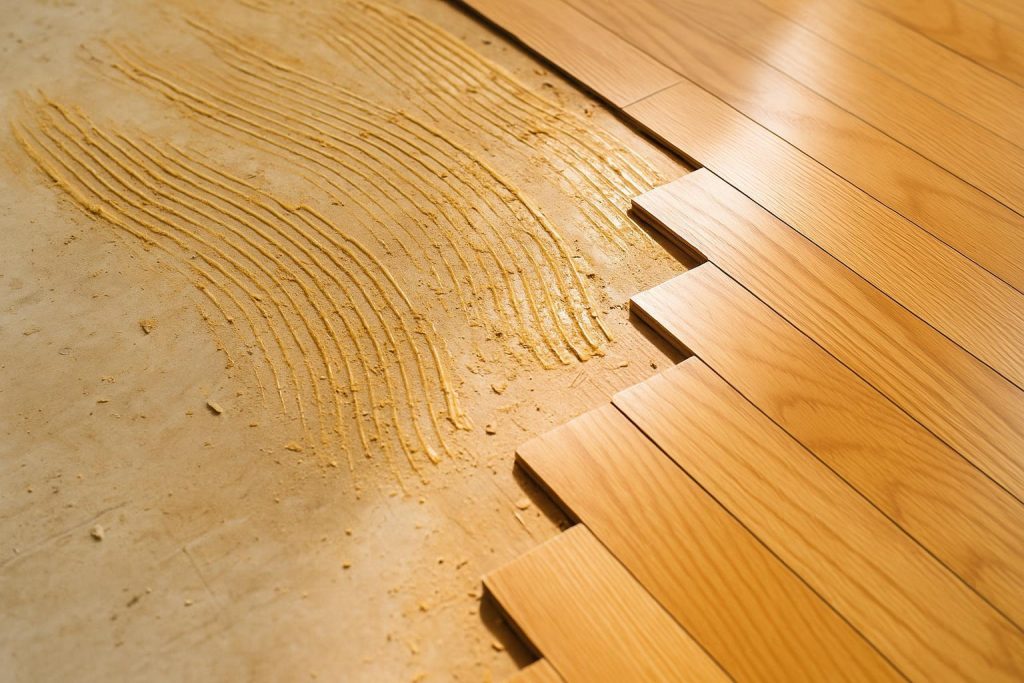
Understanding Flooring Glue and Its Challenges
Flooring glue typically contains strong chemical components designed to form a secure bond. Depending on the age of your floor, the type of glue can vary from modern water-based adhesives to older, more stubborn solvent-based formulas. This difference means removal strategies may vary in effectiveness. In some cases, you might find that the adhesive is water-soluble, while other glues require stronger chemical solvents or even mechanical methods like scraping or grinding. The key is to choose a removal method that fits the specific type of adhesive and flooring material you’re dealing with.
Essential Safety Measures
Before you begin, keep in mind that certain adhesives could contain chemicals that are potentially hazardous, especially in enclosed areas with limited ventilation. Additionally, old flooring materials could have traces of asbestos or other harmful substances, especially if the adhesive or tiles date back several decades. To ensure your safety:
- Test for Asbestos: If your flooring or adhesive is older than a few decades, consider hiring a professional to test for asbestos before disturbing any materials.
- Protective Gear: Wear gloves, safety glasses, and a mask or respirator to protect against dust and chemical fumes.
- Ventilation: Open windows and use fans to keep fresh air circulating throughout your workspace.
- Safe Disposal: Dispose of old adhesives and flooring materials responsibly, following local waste disposal guidelines.
Method 1: Hot Water or Steam for Water-Soluble Adhesives
A simple, non-toxic approach is to use hot water or steam if you suspect the adhesive may be water-based. This approach is especially helpful in older homes where the adhesive is a more traditional formula.
- Step 1: Heat water to a near-boiling temperature.
- Step 2: Pour a small volume of hot water onto the glued surface or apply steam using a handheld steamer.
- Step 3: Let the heat soften the glue for several minutes.
- Step 4: Use a scraper or putty knife to gently lift away the loosened adhesive.
This method can be repeated until most of the glue is removed. However, it may not be the fastest choice if the adhesive is particularly stubborn or if you’re working with a large surface area.
Method 2: Chemical Solvents
Chemical solvents, often labeled as adhesive removers or paint strippers, can be highly effective for many types of flooring glues. Here’s how to use them:
- Step 1 – Choose the Right Product: Look for a commercial solvent designed for your specific type of flooring glue. Always follow the instructions on the label to ensure optimal results.
- Step 2 – Apply Generously: Spread the solvent in an even layer over the surface of the glue. Make sure you’re working in a well-ventilated area and wearing protective gloves and goggles.
- Step 3 – Allow It to Soak: Most solvents need time to penetrate the adhesive. This waiting period can vary from 10 minutes to several hours, depending on the product and how stubborn the glue is.
- Step 4 – Scrape or Wipe Away: Once the glue has softened, use a scraper, putty knife, or cloth to remove the dissolved or loosened adhesive.
Keep plenty of rags on hand and be prepared to repeat the process if needed. While chemical solvents can be powerful, they often require patience and careful handling.
Method 3: Heat Gun or Hair Dryer
If you’re working with resilient adhesives that resist chemical removers, a heat gun or a heavy-duty hair dryer can help soften the glue. This method can be particularly useful for vinyl flooring or older tile adhesives.
- Step 1 – Warm the Glue: Aim the heat gun at the glued area, being careful not to overheat or scorch the floor underneath.
- Step 2 – Scrape Gently: As the adhesive softens, use a scraper to lift it away.
- Step 3 – Repeat as Necessary: Work in sections if you have a large area to cover. Focus your heat gun on one section for a few minutes, scrape, and move on to the next.
The main advantage here is that you avoid adding extra chemicals to your workspace. However, the intense heat can sometimes damage sensitive surfaces if you’re not careful.
Method 4: Mechanical Removal with Scrapers or Sanders
In situations where layers of hardened glue refuse to budge or if you’re dealing with an old subfloor that needs a thorough refresh, mechanical methods can offer reliable results:
- Floor Scraper: A long-handled floor scraper is excellent for prying up large sections of dried adhesive. This process, however, can be labor-intensive.
- Sanding Tools: For wood subfloors, using a heavy-duty sander or floor buffer equipped with abrasive pads can remove stubborn adhesive. This method will also remove a thin layer of the underlying wood, so proceed with caution.
- Grinding Machines: For concrete subfloors, specialized grinding equipment can be considered. This approach is effective but is usually best handled by experienced DIYers or professionals. Concrete surfaces can get damaged without proper technique.
Mechanical removal often creates considerable dust and debris, so make sure you wear appropriate protective gear. Also, plan your cleanup beforehand so that fine dust doesn’t spread throughout your home.
Reducing Mess and Debris
Removing flooring glue can be a messy process. You’ll likely need to dispose of old flooring materials, adhesives, and possibly leftover solvent containers. Keeping your workspace tidy as you go can reduce clutter and make the job easier. Have garbage bags, rags, and a designated disposal area ready. If the project is extensive or you just want a hassle-free approach to disposing of large quantities of debris, you can always look for professional assistance or a dedicated junk removal service.
When to Seek Professional Help
Sometimes, you might feel uncertain about what method is best, or the job is simply too big to tackle alone. If you suspect your flooring contains asbestos, is water-damaged, or if you aren’t comfortable handling mechanical equipment or harsh chemicals, it’s often safer (and quicker) to reach out to professionals. Additionally, if you’re planning an entire floor replacement, you might look into interior demolition services. Professional crews typically have the experience, equipment, and disposal methods to remove not only the adhesive but the entire floor if needed, with minimal hassle to you.
Preparing for a New Floor
Once the adhesive is removed and your subfloor is clean and level, take the time to inspect for any damage or uneven spots. A weak or uneven subfloor can compromise the quality of your new floor installation. In many cases, applying a primer or sealant can help improve your next layer of flooring’s bonding and durability. Subfloor preparation is just as crucial as adhesive removal—addressing cracks, loose boards, or any moisture issues will help ensure your new flooring stays secure.
Environmentally Conscious Choices
If you’re aiming for eco-friendliness, or have a preference for less chemical exposure, you can find biodegradeable and soybean- or citrus-based removers. These are typically safer for indoor air quality, making them worth considering—especially for families with small children, pets, or those with sensitivities to harsh fumes. While they might require a bit more elbow grease, these environmentally conscious solutions strike a good balance between safety and effectiveness.
Useful Tips and Tricks
- Work in Sections: Especially if you have a large space, tackling small sections at a time makes your project more manageable and reduces the mess you have to deal with all at once.
- Maintain Patience: Whether it’s a chemical remover soaking in or scraping away bit by bit, removing old adhesives can be time-consuming. Rushing through might damage the subfloor or necessitate costly repairs.
- Test Hidden Areas First: If you’re unsure about a new product or tool, test it on a less-visible section before going all in.
- Protect Nearby Surfaces: Use painter’s tape or plastic sheeting to cover baseboards, walls, or fixtures that might get splattered by water, solvents, or dust.
Connecting Removal and Disposal
The final step in the glue removal process is proper disposal. Adhesive materials, old tiles or planks, and even used solvents all have to be discarded according to local guidelines. If you’re removing large sections of flooring as part of a home remodel, you might also end up with a significant volume of debris. After all the scraping and sanding, proper disposal can be as big a task as the removal itself.
That’s where professional junk removal or interior demolition services can save you a great deal of time. Experienced crews can arrive with the right equipment to haul away everything, including old flooring, adhesives, and any additional junk taking up space. It quickly clears the path for you to move on to the next stage, whether that’s installing new flooring or reimagining the layout of your room.
Ensuring Long-Term Success
Once your flooring is stripped and your site is cleared, take preventive measures for the future. Always follow the manufacturer’s guidelines when installing new floors: using recommended adhesives, ensuring the subfloor is prepared, and protecting your new surface from spills or heavy impact. This helps ensure that when it comes time for another renovation down the road, you won’t be wrestling with layers of improperly applied adhesives.
Final Thoughts
Successfully removing or dissolving flooring glue comes down to pairing the right method with a bit of patience and know-how. Whether it’s using hot water, chemical solvents, heat guns, or mechanical scraping, there’s a strategy that fits your home improvement goals and your comfort level with tools or chemicals. No matter the size or scope of your project, remember that safety is paramount, especially if you suspect asbestos or other hazards.
While many homeowners may tackle glue removal on their own, there’s nothing wrong with reaching out for support if you’re dealing with a major undertaking. From hauling away the debris to conducting more extensive renovation work, professional services can save you a great deal of hassle and ensure the job is done thoroughly. Once your surface is free from old adhesive, your new floor will have the stable, clean foundation it needs for a smooth installation—leaving you with a fresh, updated space you can enjoy for years to come.