Understanding Old Flooring Removal Before Installing New Floors
Remodeling a room often involves switching out the flooring to achieve a fresh new look or improve functionality. But there is a key question many homeowners and DIY enthusiasts ask themselves: Should you remove the old flooring before installing a new one? While some projects benefit from having a clean slate, in other scenarios, leaving existing layers in place might be an option—provided the old flooring is in solid condition and not excessively thick. In this comprehensive guide, you will learn what factors to consider, the potential risks, and how to decide whether removal is the right choice. You will also walk away with tips on disposal, practical steps for handling the subfloor, and advice on when you might want to bring in a professional demolition team.
1. Why Old Flooring Removal Matters
Removing old flooring before installing new material can spare you from long-term headaches. For instance, if you place new flooring on top of existing layers that are unstable or uneven, you could run into issues such as squeaking, warping, or even cracking in the future. Even if the top layer appears stable now, below the surface there may be hidden water damage, mold, or rotting subfloor that compromises your renovation. Starting with a fresh foundation lets you properly inspect and repair any flaws before laying down the new surface.
Additionally, many flooring warranties require removing the old material first. If your goal is to protect your investment and ensure that any manufacturer warranty remains valid, following the installation instructions that recommend or require removal is crucial. This is particularly true with some engineered wood, laminate, and luxury vinyl plank products—manufacturers often specify the type of subfloor or underlayment needed for optimal performance.
2. When It’s Best to Remove the Old Flooring
- Existing Floor Damage or Weakness: If your current floor is damaged, has soft spots, or is uneven in areas, covering it with new material is likely to compound the issue. Removal allows you to assess and fix problems at the subfloor level.
- Installation Requirements: Certain new floors require direct adherence to the subfloor. For instance, tile generally needs a stable, rigid base, so planks or laminate left underneath might not provide sufficient support.
- Excessive Height or Layering: Adding layers of flooring can create annoying transitions between rooms or cause doors to drag on thick elevated surfaces. Removing old layers ensures consistent height throughout the home.
- Mold or Moisture Concerns: If you suspect water damage or mold beneath the surface, pulling up the old floor is vital. Unresolved moisture issues lead to problems that can spread into walls and adjacent areas.
Each of these considerations helps you avoid short-term aesthetic issues and long-term structural risks. In many cases, removing the old floor is an investment in the longevity and performance of your new floors.
3. Situations Where You Might Skip Removal
While it’s commonly recommended to remove old flooring, there are situations where installation over an existing floor is possible—and sometimes even practical. For example, if you have a single layer of tile in good condition and you plan to install floating laminate on top (with a proper underlayment), you can save time and labor by leaving the old floor as-is. Similarly, cement floors that have been leveled can often accommodate certain click-lock systems, provided there are no structural concerns. Still, you want to be sure your new flooring choice is compatible with the underlying materials before deciding to skip removal.
4. Inspecting and Preparing the Subfloor
The subfloor is the structural layer beneath your walking surface. It is typically made from plywood, OSB (oriented strand board), or concrete. When you remove the old flooring, you gain the opportunity to check and repair problems like cracked boards, sagging joists, or termite damage. A clean, stable subfloor helps your new floor last longer and prevents sub-surface issues from ruining a freshly installed material. Here’s a brief checklist for a subfloor inspection:
- Check for Squeaks: If you encounter squeaky sections, drive screws into the joists to secure the subfloor more firmly.
- Look for Cracks or Gaps: Minor cracks or gaps may need to be filled with wood filler or an appropriate sealant, depending on the material.
- Inspect for Moisture: Look for damp or discolored spots indicating leaks or water damage.
- Reinforce Weak Areas: If you notice boards flexing or bending, reinforce them by adding extra support where needed.
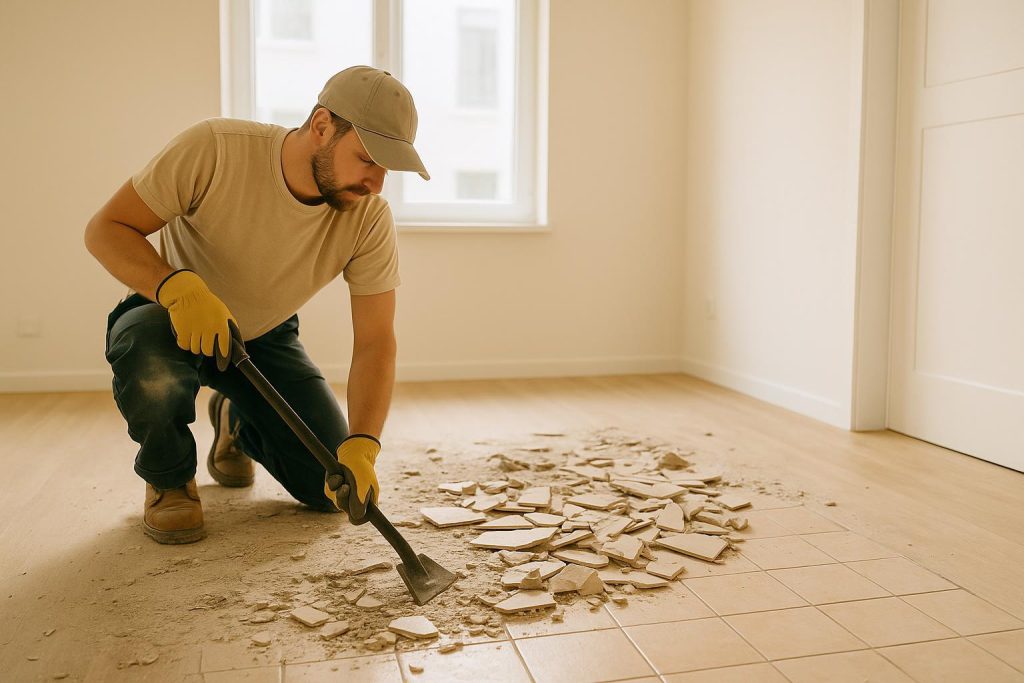
5. Flooring Removal: Tools and Tips
Once you decide to remove your old flooring, you’ll want to gather the right tools and supplies. These may include a pry bar, floor scraper, chisel, hammer, protective eyewear, heavy-duty gloves, and possibly a circular saw if you need to cut sections of flooring. Below are a few tips to streamline the removal process:
- Start Small: Begin at a corner or near an edge, using a pry bar or scraper to loosen the first few pieces. After creating a starting point, you’ll have more space to maneuver.
- Work Methodically: Move consistently in rows or sections. This keeps you organized and helps you spot problem areas like leftover screws or staples.
- Dispose of Debris Safely: Splintered wood, broken tile, and nails can be sharp. Use heavy-duty trash bags or bins, and be cautious of hazards like protruding nails.
- Assess Underlayment: If you discover an underlayment (like plywood or cement board) that’s also damaged, remove and replace it before moving forward with your new install.
In certain cases, older floors may contain asbestos or other hazardous materials—particularly in vinyl flooring and adhesives from decades past. If you suspect your home was built in an era that utilized asbestos, consider hiring an abatement professional to test samples and, if necessary, remove them safely.
6. Helpful Disposal Methods
Once your old flooring is pulled up, you’ll likely have a big pile of debris to get rid of. If the quantity is large, or if materials are heavy (such as tile or thick laminate), disposing of it yourself might be taxing. Many homeowners opt for professional junk removal services to haul away the debris quickly and responsibly. This not only saves time but also helps ensure the materials are disposed of according to local regulations. Some services may even recycle eligible materials. If you’re doing a more extensive remodeling job—such as tearing out walls, removing an entire kitchen, or pulling up multiple rooms of flooring—consider a specialized interior demolition service that can handle both the teardown and hauling side of the project.
7. Working With a Professional Interior Demolition Team
Removing old flooring might seem like a manageable DIY task, but there are instances where hiring a professional team makes sense. If you have large quantities of heavy tile, multiple layers of flooring, or potential hazards like mold or asbestos, a professional demolition crew has the experience and equipment to complete the job thoroughly and safely. They can also help you remove walls, cabinets, counters, or damaged drywall as part of a larger renovation project. Opting for a full-service approach ensures that your subfloor is prepared properly and all debris is hauled away.
Some local services in Edmonton and surrounding areas even specialize in safe, efficient demolition for residential jobs without offering large-scale commercial tear-downs. That way, you get just the help you need—nothing too big or invasive for the size of your home or renovation scope. In any case, factor in the cost of disposal and labor when weighing the pros and cons of removing the flooring yourself versus hiring help.
8. Balancing Cost, Time, and Effort
One of the biggest factors influencing your decision to remove old flooring is the balance among cost, time, and overall project scope. While many prefer to do the work themselves to save on labor costs, be mindful of the time it requires, especially if you are renovating multiple rooms. Without the right tools and help, floors can be difficult to pry up—tile in particular can be stubborn. Additionally, specialized tools like demolition hammers or heavy-duty scrapers can cost extra if you do not already own them. Renting these tools can be cost-effective, but factor in the time you need them vs. a professional’s efficiency.
9. Additional Factors to Consider Before Installing New Flooring
- Underfloor Heating: If you plan to install radiant heat beneath your floors, removing existing layers is usually required to access the subfloor and lay down heating elements properly.
- Flooring Transition Areas: If your new flooring meets other types of flooring in adjacent rooms, consistent height is key. Keeping the old floor in place might create a lip or transition that’s not just awkward—sudden changes in elevation can become tripping hazards.
- Warranty Guidelines: As noted, some flooring manufacturers provide explicit instructions. Failing to follow them could void the warranty, leaving you unprotected if defects or damages arise.
- Sound and Insulation: Some older floors may have sound-dampening or insulating properties. If you remove them, anticipate the possible need for an underlayment or sound barrier.
10. FAQs About Removing Old Flooring
Q: How long does it take to remove old flooring?
A: The time can vary greatly depending on the type of flooring, the size of the area, and how many layers you are dealing with. A small, straightforward room with laminate might take a weekend for a dedicated DIYer, while extensive tile removal or multiple layers may be best tackled by professionals.
Q: Can I install laminate over tile without removing the tile first?
A: In many instances, you can install floating laminate over tile if it’s smooth, secure, and level. Always check the manufacturer’s installation recommendations. If the tiles are cracked or uneven, removal is advised.
Q: Do I need a permit to remove old flooring?
A: Generally, simple flooring removal in residential properties does not require a permit. However, if your project involves structural changes, or if you suspect asbestos, contact your local building authorities for guidelines.
Q: What if my subfloor is damaged after removing the old flooring?
A: You may need to replace the affected boards or patch weakened spots. Ensuring your subfloor is sound will improve the longevity of your new flooring, so handle repairs before laying down the new material.
11. Conclusion: Making the Right Call
Ultimately, deciding whether to remove old flooring before installing new flooring depends on several factors, including the condition of the existing floor, the type of new flooring, and your project goals. If you have any concerns about the structural integrity of your current floors, or you simply want a fresh start, removal is often the smartest choice. It gives you the chance to repair subfloor damage, address moisture issues, and ensure that your final results look and feel as good in five years as they do on day one. On the other hand, if the existing floor is in solid shape and the new flooring material is compatible, installing over an older layer may be a time-saver.
Whether you make removal a do-it-yourself job or opt for a specialized demolition service, be sure to weigh the labor, cost, and safety considerations upfront. If you suspect your floor contains hazardous materials like asbestos or extensive mold, a professional crew is worth the peace of mind—both for your safety and the long-term performance of your floors. And if you need help disposing of large amounts of debris or want the assistance of an interior demolition service, you can explore demolition services or junk removal options to make your renovation project more efficient and manageable.