
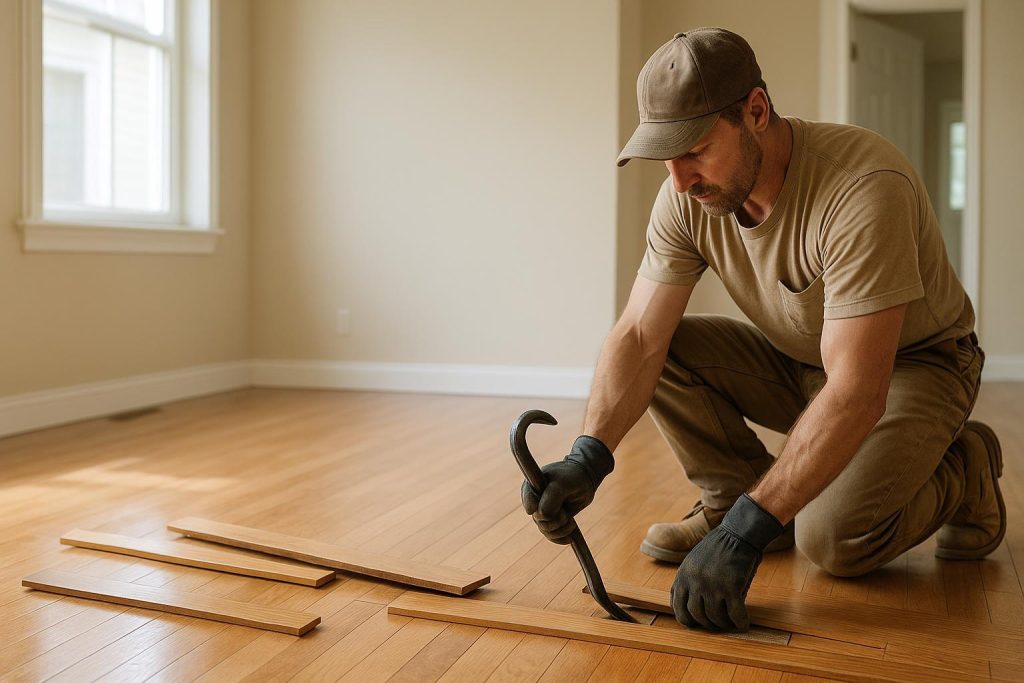
Efficient Hardwood Floor Removal: Understanding Timelines and Key Considerations
Removing old hardwood floors is a common project for homeowners and property managers looking to modernize spaces or repair damage. While it may sound straightforward—just rip up the boards and carry them out—there are several factors that can influence how long it takes. From the type of hardwood and how it’s fastened, to the size of the room and the condition of the subfloor, each detail can affect the timeline. In this post, we’ll break down the typical steps, offer practical tips, and give you a clear idea of what to expect as you plan your own hardwood floor removal.
Why Remove Hardwood Floors?
There are several reasons you might decide to remove hardwood flooring. In some cases, the planks may be old and worn, making it difficult or costly to refinish them. Other times, the wood may have suffered water damage or developed structural issues over the years. Renovations are another common catalyst—perhaps you want to update your home’s aesthetic, switch to tile or carpet, or install fresh boards to enhance your home’s value. Whatever the reason, understanding the timeline for removal is key to managing expectations, budgeting, and planning for disruption around the house.
Factors Affecting the Timeline
When it comes to determining how long hardwood floor removal takes, there is no single, one-size-fits-all answer. Several influencers come into play:
- Room Size and Layout: Naturally, larger rooms will take more time to clear. A wide-open space is often simpler than dealing with multiple hallways or tight corners.
- Type of Hardwood and Fasteners: Hardwood boards can be nailed, stapled, or glued. Glue-down floors often take longer to remove because of the adhesive residue left behind.
- Tool Access and Equipment: Having effective pry bars, floor scrapers, and, in some cases, demolition tools can speed up the process.
- Conditions Under the Floor: If there is water damage or uneven subflooring, you might spend additional time fixing or replacing sections.
- DIY vs. Professionals: A professional crew can typically move faster, though the overall timeline still hinges on factors like the floor’s condition and the home’s layout.
Keeping these factors in mind helps you set more realistic goals. If you’re dealing with a large, heavily glued floor, be prepared to invest more time than you might initially expect.
Typical Timeline for Removal
For most average-sized rooms of about 200 to 300 square feet, it can take a team of two or three people anywhere from a few hours to a full day to rip out the hardwood. When working alone, that same job could stretch over a couple of weekends, especially if you’re juggling other responsibilities. If your home has multiple rooms or larger open areas, the project can easily expand to several days of labor. In most scenarios, a professional interior demolition or junk removal team can remove an entire floor in less time than a solo DIY’er, simply because of experience, tools, and manpower.
Keep in mind that while the actual removal of the boards might happen relatively quickly, cleanup and disposal can tack on extra hours. Broken boards, nails, and piles of scrap materials need to be gathered, disposed of, and hauled away in a responsible manner. That’s where some people opt for professional help, particularly if they lack a suitable vehicle for transporting bulky debris or if their municipal waste guidelines don’t accommodate this kind of material.
Step-by-Step Removal Process
If you choose to do it yourself, understanding the standard removal process can help you plan better and avoid common pitfalls:
- Prep the Area: Remove furniture, rugs, and any obstacles. Ensure vents are sealed to minimize dust spread and protect adjacent rooms.
- Safety Gear: Wear protective glasses, gloves, and a dust mask. Hardwood removal can release debris and dust particles.
- Start at an Edge: Pry up the first plank at a doorway or corner. Once you’ve got an opening, you can work your way across the floor.
- Loosen Fasteners: Use a pry bar or specialized flooring scraper if nails or staples are in place. If the flooring is glued down, you’ll need to break the adhesive bond—often requiring extra elbow grease or specialized tools.
- Remove Debris Continuously: Keep the workspace clear to avoid slips and to make the job more efficient.
- Inspect Subfloor for Damage: Once the boards are up, check for any rot or water issues. Address these before installing new flooring.
- Clean Thoroughly: Vacuum or sweep up leftover debris, stray nails, and dust. Proper cleanup ensures you’re not tracking old adhesive or fragments through the house.
This outline should help you anticipate the major steps involved. While it’s feasible to handle each stage using common home-improvement tools, the process can become tedious or time-consuming if the flooring is stubbornly attached or if the subfloor is damaged.
Minimizing Disruption
Removing hardwood floors can get noisy and messy. It’s wise to consider the rest of your household or neighbors—and to schedule around work hours or quiet times, especially if you live in areas with strict noise ordinances. To keep dust from circulating through your home, seal off doors and vents, run fans to improve ventilation, and cover items you can’t move with plastic sheeting. For extra-large projects, you might need to plan a temporary relocation to one part of the house until the removal and cleanup are finished.
When to Hire a Professional
If you don’t have the time, the right tools, or the physical ability to handle the job, hiring a professional can be the most efficient option. Professional interior demolition teams, like those specializing in Interior Demolition, typically remove hardwood floors quickly and handle the entire debris-hauling process. By bringing in a crew, you can reduce your overall timeline, maintain a cleaner environment, and ensure you’re not spending your weekends struggling with stubborn nails or adhesives. This is particularly helpful for busy homeowners or landlords managing rental properties that need a quick turnover.
Many professional services in Edmonton and surrounding areas also offer Junk Removal solutions. This means they can take care of furniture hauling, renovation debris, and old flooring disposal all in one go. With experienced crews on-hand, a job that might take you multiple days can often be completed faster, allowing you to move on to the next phase of your renovation or cleanup.
Safe and Proper Disposal
After the hardwood has been pried up, there’s still the challenge of disposing of it. Not all municipal waste programs accept lumber, especially if it’s stained, varnished, or treated. Gathering and hauling old boards to the landfill yourself can be time-consuming and might incur fees. A junk removal team, however, integrates the disposal process into their service. This can also include removing nails, bagging smaller debris, and transporting the waste to approved facilities.
Do’s and Don’ts for a Smooth Experience
To ensure your project goes off without a hitch, consider these helpful pointers:
- Do plan ahead: Know the extent of your project, gather tools, and clear a path for debris removal.
- Do protect the rest of your home: Use drop cloths or tape off doorways to prevent dust spreading into other rooms.
- Do inspect for hidden damage: If you see mold, mildew, or extensive water damage, address those issues promptly.
- Don’t ignore safety gear: Splinters and old nails can lead to injuries if you’re not wearing gloves and boots.
- Don’t rush: Even if you’re eager to install new floors, taking the time to remove the old ones properly prevents future headaches.
- Don’t forget about cleanup: Make sure you have a plan for removing and disposing of the old boards. This step can be just as time-consuming as the actual teardown.
Common Myths About Floor Removal
Myth 1: “You must remove hardwood floors piece by piece with minimal breakage.” In truth, old floors are often not salvageable, so the quickest approach is to tear them out in sections unless you plan to reuse or sell them.
Myth 2: “Hardwood floor removal is always fast.” While small areas may come up quickly, certain adhesives or heavy nails can prolong the process quite a bit.
Myth 3: “Professional help is unnecessary.” For some DIYers, this may be true, but if you’re dealing with multiple rooms, heavy damage, or time constraints, bringing in experts can save frustration and cost in the long run.
Putting It All Together
So, how long does it take to rip out hardwood floors? Much depends on the size of the area, how the boards are attached, and whether you tackle the job yourself or hire professionals. For a moderately sized space of 200 to 300 square feet, expect anywhere from a handful of hours to a full day for a dedicated team, plus additional time for cleanup and disposal. Larger or more complex projects can take several days. If you’re handling the work solo, be aware that the process can extend over weekends or longer, particularly if you’re pausing to manage disposal along the way.
In many cases, speeding up the job is as simple as having a good plan and the right tools. Other times, calling in professional services is a no-nonsense solution—especially if you’re short on time or don’t want to worry about the logistics of disposal. In Edmonton, St. Albert, Sherwood Park, and nearby areas, you can find experienced teams that specialize in both Demolition and junk removal, often offering a streamlined experience to clear out and clean up all at once.
Whether you undertake the project yourself or lean on a professional crew, the key is to balance your time, resources, and end goals. Proper planning, adequate safety measures, and efficient disposal are all part of ripping out hardwood floors successfully—especially if you want to replace them with something fresh and updated. Above all, keep in mind that doing the job properly from the outset will save you potential headaches down the road. If you have questions or need advice, don’t hesitate to reach out or contact us to get started.