
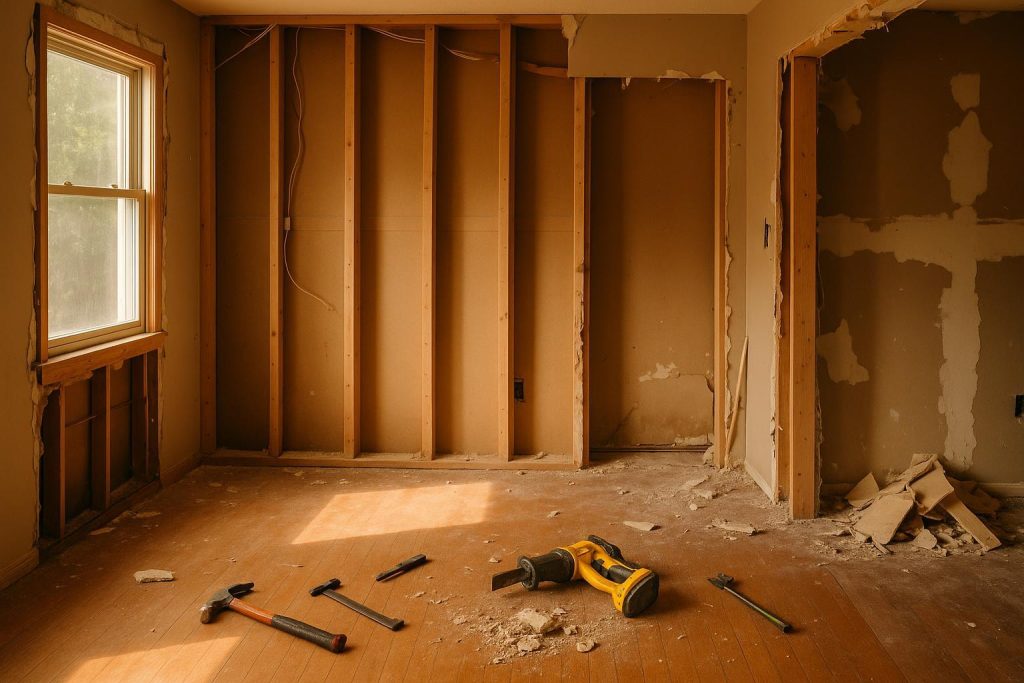
Understanding the Drywall Demolition Process
Drywall demolition can seem like a daunting task, but it’s more straightforward than most people think. Whether you’re renovating a room to update its style or tearing down walls for a new layout, removing drywall is typically one of the first steps. It involves proper planning, careful tool use, and a firm understanding of how to handle debris responsibly. Below, we’ll walk you through the key stages of drywall demolition and share tips on safety, efficiency, and proper disposal. Whether you plan to do some DIY work or hire professionals, understanding this process will help you confidently tackle your project.
What Is Drywall Demolition?
Drywall demolition is the process of tearing out drywall panels from walls or ceilings. It often becomes necessary when homeowners or business owners decide to remodel, renovate, or repurpose a space. Since drywall is usually one of the final layers in interior construction, it must be removed carefully. Proper demolition ensures you don’t damage important infrastructure items underneath, like wiring, plumbing, or structural elements. By following clear steps and best practices, you can remove your old drywall safely and prepare the room for new walls, finishes, or any other renovations.
Why People Need Drywall Demolition
There are several reasons you might find yourself needing to remove drywall. Maybe you want to refurbish or replace water-damaged walls, or perhaps you’re opening up a floor plan and need to knock down some partitions. Property owners might also need to remove contaminated drywall after a fire or mold infestation. Whatever the motivation, the process is similar: review the project, gather tools, plan your approach, and complete the demolition in a clean, safe way.
Tools and Safety Gear You Will Need
Before you begin, take a moment to round up the right tools and protective gear. This step is critical. Proper tools make your work smoother and safer, whether you’re removing a small sheet or demolishing an entire room’s worth of drywall. Here’s a quick checklist:
- Pry Bar: Useful for popping panels away from studs and joists.
- Hammer or Mallet: Ideal for tapping through stubborn drywall sections.
- Utility Knife: Helps score edges and cut through joint tape or smaller sections easily.
- Screwdriver or Drill: In case you need to remove any screws or fixtures attached to the drywall.
- Stud Finder: Lets you locate studs and minimize accidental damage to pipes or wires hidden behind the walls.
- Protective Gear: Wear safety glasses to shield your eyes from flying debris, gloves to protect your hands, and a dust mask or respirator to prevent dust inhalation.
- Tarps and Drop Cloths: These aren’t technically tools, but they keep your floors safe from heavy debris.
While each scenario can be different, these basic items typically handle most drywall demolition jobs. If you find your walls are held together with heavy screws, a drill will save you time and trouble. Likewise, a simple drywall saw can help when you need to cut through large panels without generating too much dust.
Step 1: Preparation and Site Assessment
Preparation is the foundation for safe and efficient drywall demolition. In this stage, you’ll inspect the area to identify potential hazards, decide which walls you want to remove, and confirm that there are no live utilities behind the drywall. Turn off the circuit breakers or shut off the electrical supply if the area behind the drywall contains wiring. Unplug or disconnect any fixtures, light switches, or electrical outlets situated on the drywall that’s coming down. If plumbing is present in or near the walls, make sure to shut off the water supply and drain the lines if necessary. Planning ahead helps avoid accidental damage and prevents injuries related to electricity or leaking pipes.
If the drywall is part of a larger space that includes furniture, floors you’d like to protect, or other valuable items, clear them out or shield them behind protective materials. Some people worry that dust and debris will spread throughout the entire house, so consider sealing off doorways with plastic sheets if you’re working in a confined area.
Step 2: Factors to Consider Before Starting
Before diving into the removal process, check local building codes, especially if you’re removing load-bearing walls or making changes that could impact your home’s structure. You might also need a permit for certain types of demolition. Consult with a local authority or a structural engineer if you are unsure. This caution can save you trouble later, especially when you’re renovating property in areas with specific regulations.
Another key factor involves asbestos or lead paint. Older homes often contain materials that were made before certain regulations were put in place. If you suspect the drywall or joint compounds contain hazardous materials, consider contacting a professional to safely test and remove them. This helps protect your family and the environment from harmful exposure.
Step 3: Removing Drywall Panels
Once you’ve prepared the environment, removed obstacles, and checked for hazards, you’re ready to start the physical demolition. You can begin at a corner or seam of the wall by scoring it with a utility knife. This creates a weak point to start prying the drywall away from the studs. Using your pry bar, gently pull back the sheet. Be mindful of what’s behind it, because you never want to force the panel so aggressively that you hit a hidden pipe or electrical line.
For ceilings, you might want extra help. Attempting to pry or cut overhead drywall alone can lead to injury if a large piece falls unexpectedly. Work in sections, removing small chunks of drywall so that they are easier to handle and less likely to create big clouds of dust. Use a step stool or ladder where needed, but make sure it’s secure. Ceiling demolitions can be tricky, so always practice caution. The key is methodical, steady progress rather than brute force.
If you find screws or nails that are still embedded, remove them with a claw hammer or drill. This step cleans up your studs and joists. Smooth studs make it easier to install new drywall later and eliminate sharp edges that could cause injuries down the road. Aim to keep nails and screws in a small container so they don’t get lost on the floor. You’ll appreciate this organizational effort when moving on to the disposal phase.
Step 4: Handling Debris
Drywall debris can accumulate quickly, especially if you’re taking down entire walls or multiple rooms. Keep trash bins or contractor bags nearby. If you’re removing large chunks, you might consider rolling them up in a tarp or simply stacking them in a contained corner until you’re ready to haul them away.
At this point, many individuals ask: is it possible to recycle old drywall? Some regions accept drywall scraps at specialized facilities, particularly if the material is clean and free from contaminants like mold or asbestos. Check local rules to see if recycling is an option. Keeping your site tidy not only helps with safety but also makes the final cleanup much faster.
Step 5: Cleanup and Disposal
Once you’ve removed all the drywall from your demolition area, conduct a final sweep. Remove any dust, small debris, or leftover fragments to create a clear workspace for the next phase of your remodeling. Properly labeling your disposal bags or containers can help if you’re taking them to a local landfill or recycling center. You don’t want to hold up the disposal process by mixing in other types of waste that might violate local sorting rules.
If the drywall is contaminated or has been exposed to toxins (like mold, mildew, or asbestos), speak with your waste management facility before disposing of it. They may have a specific method for handling hazardous debris. Proper disposal ensures a healthy indoor environment and meets local regulations.
Common Pitfalls to Avoid
Rushing through drywall demolition can lead to mistakes. Here are a few common pitfalls:
- Skipping Utility Checks: Failing to turn off power or water can cause significant damage and pose major safety risks.
- Using the Wrong Tools: A hammer alone may not be enough. Without proper tools, you risk damaging your studs or injuring yourself.
- Forgetting Protective Gear: Drywall dust can irritate your eyes and lungs. Overlooking safety equipment leads to discomfort and potential harm.
- Mismanaging Debris: Allowing piles to accumulate is both unsafe and disorganized, making it harder to move around and finish the job.
By staying mindful of these obstacles, you’ll maintain a smooth, efficient demolition.
When to Call a Professional
Although some drywall demolition projects are manageable in a DIY setting, certain situations may require professional assistance. If you have multiple layers of old drywall, suspect lead paint or asbestos, or need to demolish ceilings in high or awkward areas, it might be wise to leave the job to experienced specialists. Professionals also handle large-scale tear-outs faster, thanks to specialized equipment and expertise. Moreover, they’ll ensure that all building codes are followed, and they can often manage debris disposal on your behalf.
Another important consideration is time. Do you have the bandwidth to handle a demolition project when you’re juggling a busy schedule? A professional service usually comes equipped with the right tools, safety gear, and a team to speed up the project, leaving you with fewer headaches and less downtime. Plus, if plumbing or electrical lines need rerouting, you may need licensed contractors to ensure everything is done by the book.
Working with Professional Interior Demolition Services
If you’re in the Edmonton area and looking for help, an interior demolition service can be a game changer. Professional crews often bring a systematic approach to drywall removal, ensuring that studs or frames remain intact, utilities are safeguarded, and the work area is kept as dust-free as possible. The benefit is that they’re trained to spot potential issues—like hidden mold or structural weaknesses—before they become bigger problems. This proactive vigilance reduces unexpected surprises, saving you time and money during a renovation.
How We Help with Interior Demolition
When you hire a team that specializes in interior demolition, you often get a one-stop solution. They’ll handle your drywall tear-out, manage the cleanup, and dispose of debris so you don’t have to. This level of professional care ensures that your project remains manageable, especially if you’re removing more than just drywall. Perhaps you’ll also need to remove flooring or kitchen cabinets afterward. By hiring pros for the entire interior demolition, you streamline the process and reduce the stress of coordinating multiple tasks on your own.
The Benefits of an Organized Demolition
It’s easy to underestimate how big a difference organization makes. A well-planned drywall removal prevents dust from spreading all over the house, protects important fixtures from damage, and helps you save money by reducing unexpected repairs. In many cases, the demolition can be the most disruptive part of a renovation, so doing it right sets a positive tone for the rest of your project.
Here are some advantages of an organized demolition:
- Cleaner Workspace: By using plastic sheeting and sealing off doors, dust and debris remain contained, making for quick cleanup.
- Faster Progress: Systematic removal ensures you won’t spend extra hours dealing with leftover nails or screws. The next stage in your project—be it framing, wiring, or installing new drywall—will start sooner.
- Lower Risk of Damage: Careful planning means you’re less likely to tear through important pipes or wiring hidden behind panels.
- Reduced Stress: Keeping your crew and materials organized cuts down on frustration and confusion. Nobody wants to search for a lost tool under a pile of broken drywall.
Disposing of Drywall Responsibly
One of the biggest post-demolition tasks is disposing of all that drywall safely. Depending on your location, you may have to adhere to local waste regulations. Some contractors or demolition specialists handle disposal as part of their service, taking the guesswork off your shoulders. If you’re handling it yourself, research local transfer stations to see if they accept construction materials. In some areas, you can schedule a curbside pickup, though you might need to pay an additional fee.
Clean drywall scraps might be recyclable, but that depends on whether the facility accepts them and how contaminated they are. Always check before loading up your car or renting a trailer. If you find moldy or wet drywall, you’ll need to follow different rules at certain facilities. By disposing of old drywall responsibly, you help maintain a safer environment and support future building and renovation efforts that rely on recycled materials.
Final Steps and Next Moves
After the debris is gone, make sure your workspace is ready for whatever comes next—whether that’s new insulation, rewiring, or simply putting up fresh drywall. Because you’ve followed a thorough demolition process, you’ll have exposed the bones of your wall or ceiling, making it easier to see if any repairs or upgrades are needed. Double-check if there are any hidden issues like damp wood or signs of pests. Taking a moment to address these concerns can save you headaches down the line.
Once you feel satisfied that everything is clean, safe, and up to code, you’re ready to proceed. If part of your plan is to remove other structures as well—like cabinets, flooring, or tiles—you can extend your demolition approach to those areas. For help with bigger projects, be sure to consult a qualified demolition or waste removal service.
Conclusion
Drywall demolition is more than just tearing down walls. It’s a systematic process that includes planning, safety precautions, proper tool use, responsible disposal, and thorough cleanup. Whether you take on the job alone or bring in professional help, being informed is key. Follow the outlined steps, remain organized, and always put safety first. With the right plan and mindset, you can turn any drywall demolition project into a manageable part of your larger renovation—paving the way for a fresh new space that meets your needs and suits your style.